In order to detect cheating during a coding test, Mapit provides cheating prevention mechanisms like,
Webcam Monitoring, this feature allows capturing of test takers’ periodic images during an exam/test.
Window Proctoring, this feature mandates that the candidates stay on the test screen for the whole duration of the test.
Copy Detection Module, this checks a submission across all submissions and gives a report with similarity and different metrics.
The above features will help recruiters filter out candidates and maintain the integrity of the test. The recruiter can select a candidate, interpret this report and choose to Reject or Shortlist a candidate at this stage itself.
Below are the two ways these features can be applied to detect and analyze cheating during a coding test.
Red Flag:
Once the reports are generated the candidates who cheated during the test, will be flagged red by the platform.
You can click on the red flag next to the concerned candidate to get the details on, how long they have shifted screen for the whole duration of the test.

Plagiarism Report:
The coding tests generate Plagiarism Report along with the test reports. Details on the similarity match on the submitted codes, for individual coding questions is available here. You have the provision to set a bar, that helps in filtering out candidates based on the level of submission similarity.
This is how it can be checked:
Step 1: Log into your MAPIT account
Step 2: Click on Manage Tests on the Menu bar
Step 3: In Test Hosted, click on Reports next to the concerned test.
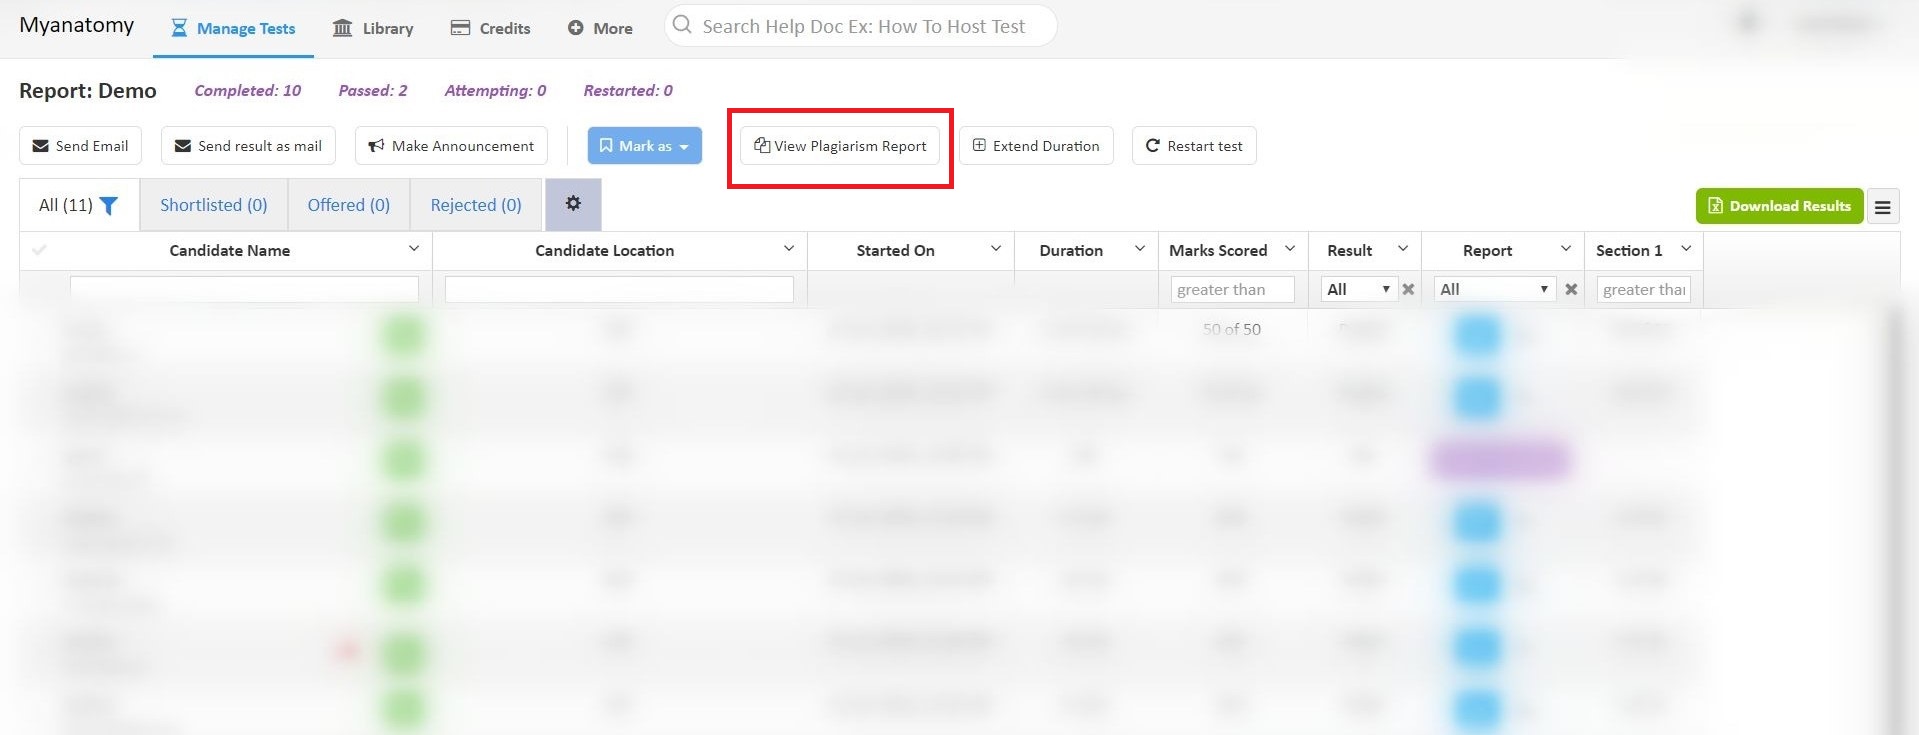
Step 4: Click on Plagiarism Report

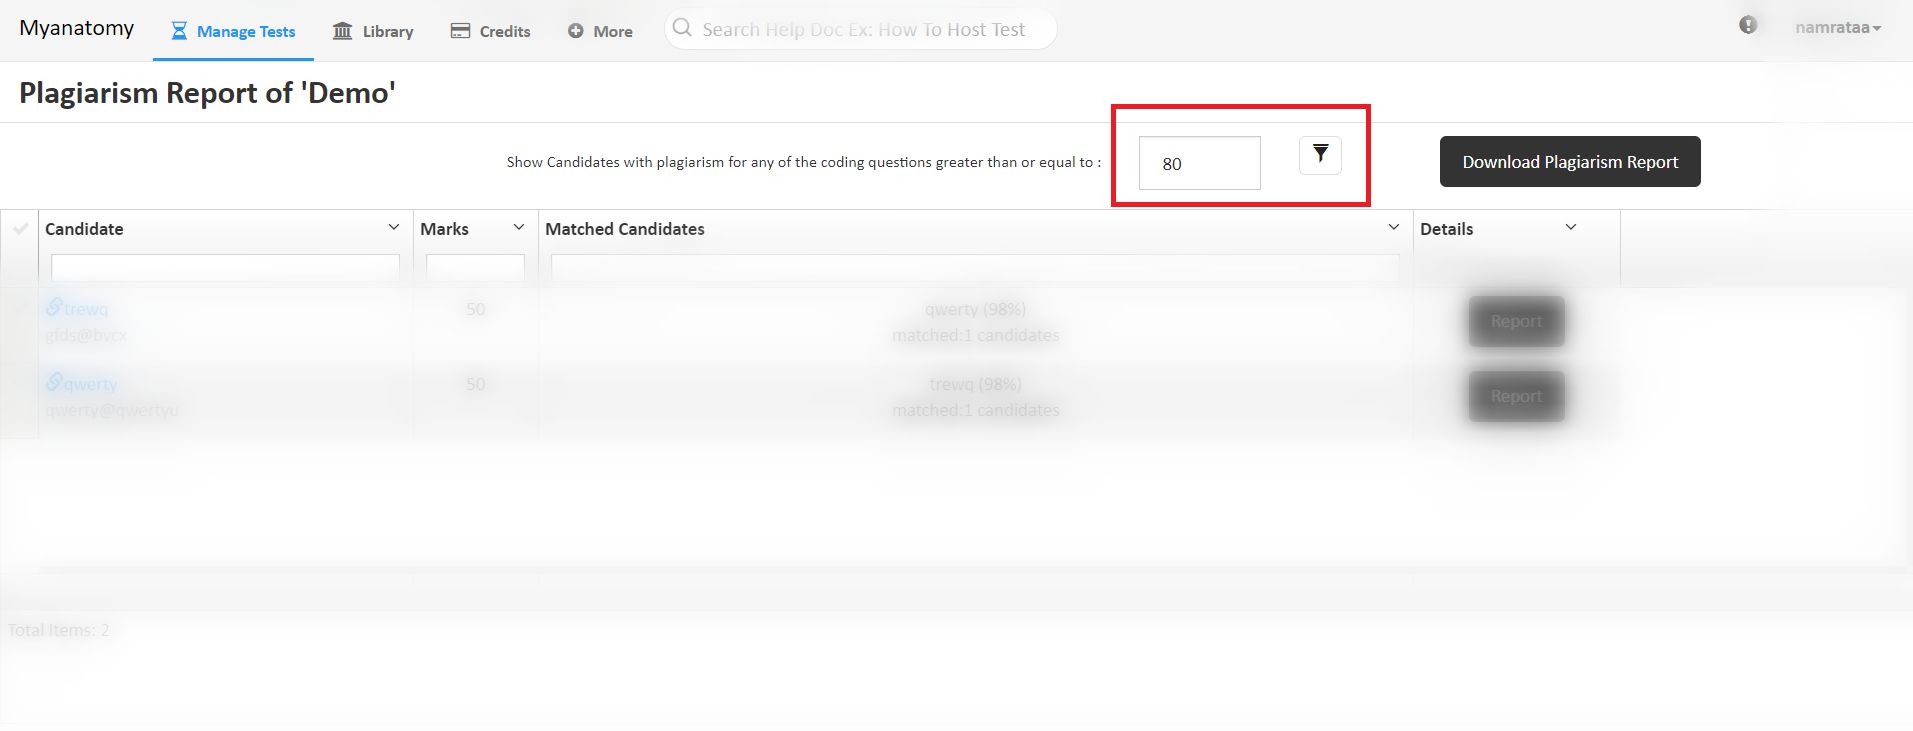
Step 5: Set a limit to filter out candidates.

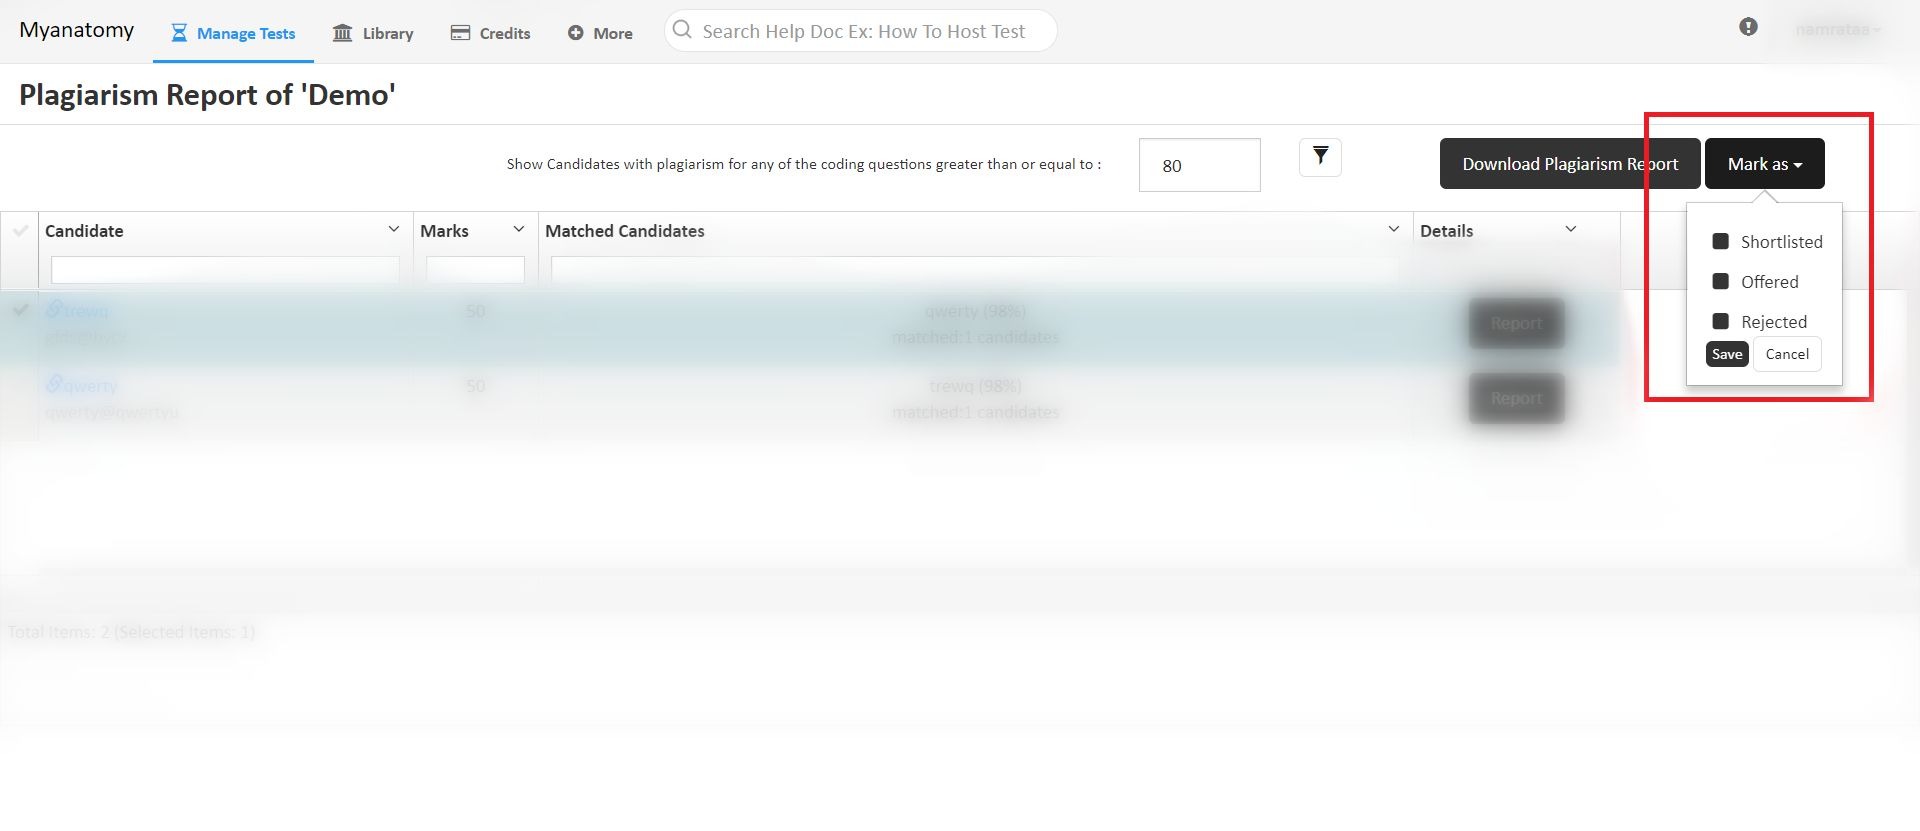
Step 6 (Optional): You have the provision of selecting one candidate at a time and mark them as required; i.e, Shortlisted, Rejected or Offered.

Step 7 (Optional): You can also select one candidate for a more comprehensive analysis and view the detailed report along with their answers by clicking on Report next to the respective candidate.
